Personalised Bauble in a Gift Bag Tutorial with FREE TEMPLATE

Are looking for a charming and personalised gift for the upcoming holiday season? Try this unique bauble, with a matching gift bag. This delightful craft project is not only perfect for gifting but also for adding a personal touch to your holiday decorations. Whether you're making this for someone special or as a festive keepsake, this project is quick, easy, and enjoyable.

Materials You'll Need:
A4 Craft Cardstock (2 sheets)
Distress Oxide Ink Pad
Snowflake Stamp
Double-Sided Tape or Wet Glue
Craft Knife and Cutting Mat (if not using a cutting machine)
Cricut Cutting Machine (optional)
CraftStash Sticky Vinyl
Transfer Tape
Cricut Tools (if using a Cricut machine)
Sticky Mats (if using a Cricut machine)
Twine or String
Small Hole Punch
Ribbon
Decorative Fillers (e.g., mini trees, glitter)
Free SVG File or Paper Template (Download link below)

Step 1: Cut Your Bauble and Bag Templates

Begin by using the provided SVG file to cut out your bauble and bag templates. You can cut these from two sheets of A4 craft cardstock. Make sure that your bauble fits nicely within the circular space, allowing you to fold the two side pieces without touching the edges.
Step 2: Decorate the Bag

Before assembling the bag, add a decorative touch. Use a simple snowflake stamp and Distress Oxide ink to create a charming design on the bag. Don't forget to ink around the edges for a polished look.
Step 3: Construct the Bag

To assemble the bag, apply double-sided tape along the tabs. If you prefer, you can also use wet glue. Be sure to firmly press the tabs to ensure they stick, especially with craft cardstock. Fold the two panels together, ensuring the larger base tabs are on the same side. Fold over the other tab and fold the base.
Step 4: Design and Cut the Vinyl

Now, it's time to design the vinyl for your bauble. Use CraftStash sticky vinyl to create a personalised message. Adjust the size of your design to fit within the aperture on the bag. In our example, we've used the name "Holly" for a first Christmas bauble. Mix fonts for a unique touch.
Step 5: Cut and Apply the Vinyl

Cut out your vinyl design and apply it to the bauble. This adds a special touch to your creation, whether it's for a baby's first Christmas, a newlywed couple, family members, or even a pet.
Step 6: Fill the Bauble

Fill your bauble with small trees, decorations, and some glitter to create a snowy effect inside. Ensure the bauble is sealed securely to prevent any spills.
Step 7: Thread the String

Secure the string or twine at the top of the bauble. Make sure it's centred, and you can tape it in place temporarily with repositionable tape. Now, punch a hole through all the layers at the top with a small hole punch. This is where you'll thread the ribbon later.
Step 8: Assemble Your Gift

Place your finished bauble inside the decorated gift bag. Make sure the name is visible at the front. If desired, tape the string at the top of the bag with low Tac repositionable tape.
Voila! You've created a stunning personalised ornament in a beautifully crafted gift bag. You can download this template as an SVG for your cutting machine or as a paper template for manual cutting. We'd love to see your creations! Tag us with #CraftStash to share your unique bauble and gift bag designs. You can find all the supplies you need at Craft Stash for your future crafting endeavours.
Happy crafting, everyone!
Watch the full video tutorial here!
Download your template here:
-
 Ranger Ink Tim Holtz Distress Oxide Ink Pad Brown | Gathered TwigsSpecial Price $5.59 Regular Price $5.99 RRP $6.99 Save $1.40Out of stock
-
 Categories: All
Spotlight Stamping with a TWIST!
In this tutorial Lou is going to show you how to create a fun and artsy card with a unique twist on the spotlight technique. This project is quick, simple, and has a surprise element that I think you'll love. -

-
-
 Categories: All
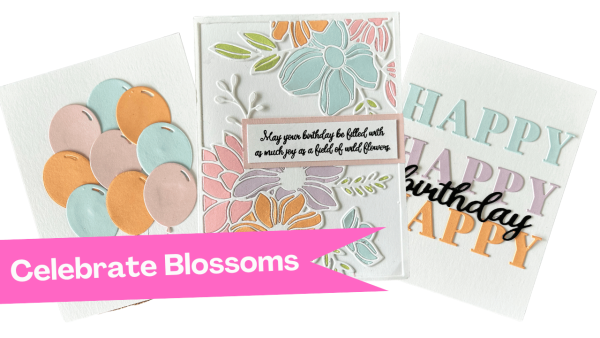
Creative Ways to Use Cover Plate Dies in Your Cardmaking Projects with New Celebrate Blossoms Release from Justine Hovey
New from Justine Hovey -